RPi OS 実行環境整備

2024/05/26 22:05 OS別::Linuxその他::技術情報
正直なところ、これは個人の好みなのですけれども。
実行環境を、使いやすいように整備します。

テキストエディタ (Vim)

エディタ変更(1)

デフォルトでは nano が選択されているので、これを vim に変更します。
update-alternatives コマンドで、以下のように vim の番号を入力します。
$ sudo update-alternatives --config editor
alternative editor (/usr/bin/editor を提供) には 3 個の選択肢があります。

  選択肢    パス             優先度  状態
------------------------------------------------------------
* 0            /bin/nano           40        自動モード
  1            /bin/ed            -100       手動モード
  2            /bin/nano           40        手動モード
  3            /usr/bin/vim.tiny   15        手動モード

現在の選択 [*] を保持するには <Enter>、さもなければ選択肢の番号のキーを押してください: 3
update-alternatives: /usr/bin/editor (editor) を提供するためにマニュアルモードで /usr/bin/vim.tiny を使います
$

エディタ変更(2)

Debian 系の人は vi がよっぽど嫌いなのか、設定項目としてまだ不足するのでこちらも修正します。
$ select-editor

Select an editor.  To change later, run 'select-editor'.
  1. /bin/nano        <---- easiest
  2. /usr/bin/vim.tiny
  3. /bin/ed

Choose 1-3 [1]: 2
変更されたかどうかは、以下のリンクを確認します。
$ ls -l /usr/bin/editor
lrwxrwxrwx 1 root root 24  2月 14 00:54 /usr/bin/editor -> /etc/alternatives/editor

vimrc 作成

行の表示等、vi のデフォルト動作を変更したいので作成します。
$ vi --version | grep "vimrc file"
   system vimrc file: "/etc/vim/vimrc"
     user vimrc file: "$HOME/.vimrc"
 2nd user vimrc file: "~/.vim/vimrc"
$ cd ~
$ mkdir .vim
$ vi .vim/vimrc
$ cat .vim/vimrc
set nu

.bash_aliases 作成

.bashrc や .bash_profile に追記してもいいのですが、ファイルを置くだけで使えるので利用します。
$ cd ~
$ vi .bash_aliases
$ cat .bash_aliases
# some more ls aliases
alias ll='ls -l'
alias la='ls -A'
alias l='ls -CF'

RPi OS raspi-config

2024/09/17 01:59 OS別::Linuxその他::技術情報
Raspberry Pi を利用したサーバの、初期に行うべき手順で raspi-config を実行します。
対象は、Raspbian GNU/Linux 12 (bookworm) になります。


raspi-config

以前までの Raspberry Pi OS では raspi-config の nonint モードで全て設定できたのですが、Raspbian GNU/Linux 12 (bookworm) では、変更されたパッケージの影響等で以前のバージョンから利用できなくなっている nonint モードがあるので CUI で一通り設定します。
No項目説明
1System OptionsConfigure system settings
2Display OptionsConfigure display settings
3Interface OptionsConfigure connections to peripherals
4Performance OptionsConfigure performance settings
5Localisation OptionsConfigure language and regional settings
6Advanced OptionsConfigure advanced settings
8UpdateUpdate this tool to the latest version
9About raspi-configInformation about this configuration tool
7 が飛んでいますが、表示上も存在しません。

1 System Options

No項目説明
S1Wireless LANEnter SSID and passphrase
S2AudioSelect audio out through HDMI or 3.5mm jack
S3PasswordChange password for the 'jimba' user
S4HostnameSet name for this computer on a network
S5Boot / Auto LoginSelect boot into desktop or to command line
S6Splash ScreenChoose graphical splash screen or text boot
S7Power LEDSet behaviour of power LED
S8BrowserChoose default web browser
サーバー用途として設定するので、RPi OS インストール の通りに設定している場合は、上記項目 S5 のみが対象になると思います。
S5 Boot / Auto Login
ここでは B1 を選択して <了解> します。
No項目説明
B1ConsoleText console, requiring user to login
B2Console AutologinText console, automatically logged in as 'example' user
B3DesktopDesktop GUI, requiring user to login
B4Desktop AutologinDesktop GUI, automatically logged in as 'example' user

2 Display Options

以下の設定項目がありますが、特に設定変更するものはありません。
No項目説明
D1UnderscanRemove black border around screen
D2Screen BlankingEnable/disable screen blanking
D3VNC ResolutionSet resolution for headless use
D4CompositeEnable/disable composite output

3 Interface Options

以下の設定項目がありますが、RPi OS インストール の通りに設定している場合は、特に設定変更するものはありません。
No項目説明
I1SSHEnable/disable remote command line access using SSH
I2VNCEnable/disable graphical remote desktop access
I3SPIEnable/disable automatic loading of SPI kernel module
I4I2CEnable/disable automatic loading of I2C kernel module
I5Serial PortEnable/disable shell messages on the serial connection
I61-WireEnable/disable one-wire interface
I7Remote GPIOEnable/disable remote access to GPIO pins

4 Performance Options

以下の設定項目がありますが、特に設定変更するものはありません。
No項目説明
P2Overlay File System Enable/disable read-only file system

5 Localisation Options

以下の設定項目がありますが、RPi OS インストール の通りに設定している場合は、L4 のみの設定変更となります。
No項目説明
L1LocaleConfigure language and regional settings
L2TimezoneConfigure time zone
L3KeyboardSet keyboard layout to match your keyboard
L4WLAN CountrySet legal wireless channels for your country
L4 WLAN Country
「JP Japan」を選択して <了解> すると、次のメッセージが表示されます。
Wireless LAN country set to JP
これは、Wi-Fi で使う電波(周波数)の範囲を、それぞれの国の事情に合わせて指定するもののようです。
そのため設定しない場合、違法電波を出力することがあります。

6 Advanced Options

以下の設定項目がありますが、RPi OS インストール の通りに設定している場合は、特に設定変更するものはありません。
No項目説明
A1Expand FilesystemEnsures that all of the SD card is available
A2Network Interface NamesEnable/disable predictable network i/f names
A3Network Proxy SettingsConfigure network proxy settings
A6WaylandSwitch between X and Wayland backends
A7Audio ConfigSet audio control system

8 Update

以下のコマンドを実行したのと同じく、Raspberry Pi OS をアップデートします。
$ sudo apt -y update && sudo apt -y upgrade
どこかで実行する必要があるので、ここで update を実行しておきます。

もし、次の警告メッセージが表示されたら、とりあえず対象キーを mv してみてください。
W: http://raspbian.raspberrypi.com/raspbian/dists/bookworm/InRelease: Key is stored in legacy trusted.gpg keyring (/etc/apt/trusted.gpg), see the
私が行った作業は、以下の通りです。
$ sudo apt update
Hit:1 http://archive.raspberrypi.com/debian bookworm InRelease
Get:2 http://raspbian.raspberrypi.com/raspbian bookworm InRelease [15.0 kB]
Fetched 15.0 kB in 3s (5,431 B/s)
Reading package lists... Done
Building dependency tree... Done
Reading state information... Done
1 package can be upgraded. Run 'apt list --upgradable' to see it.
W: http://raspbian.raspberrypi.com/raspbian/dists/bookworm/InRelease: Key is stored in legacy trusted.gpg keyring (/etc/apt/trusted.gpg), see the DEPRECATION section in apt-key(8) for details.
$ sudo mv /etc/apt/trusted.gpg /etc/apt/trusted.gpg.d
$ sudo apt update
Hit:1 http://archive.raspberrypi.com/debian bookworm InRelease
Get:2 http://raspbian.raspberrypi.com/raspbian bookworm InRelease [15.0 kB]
Fetched 15.0 kB in 3s (5,970 B/s)
Reading package lists... Done
Building dependency tree... Done
Reading state information... Done
1 package can be upgraded. Run 'apt list --upgradable' to see it.
参考URL
This worked for me...
Code: Select all

sudo cp /etc/apt/trusted.gpg /etc/apt/trusted.gpg.d

I ended up using the same thing, except I'm doing a mv instead of a cp. I'm thinking of including this in the ansible scripts I use for building a new Raspberry Pi setup.
Just a moment...

9 About raspi-config

raspi-config についてメッセージが表示されます。
記事を作成した時点では、raspi-config は Version: 20231108 でした。

RPi OS インストール

Raspberry Pi Imager を利用して Windows 端末で microSD カードに Raspberry pi OS をインストールする手順です。

準備するもの

前提として、インターネット接続環境があり、それぞれの機械が故障していないものとします。

Windows 端末

No名称備考
1Windows 端末 一式
2microSD カードライタ

Raspberry Pi 端末

No名称備考
1Raspberry Pi 3 Model B
2USB 電源
3microSD カード(16GB 以上のもの)

Windows 端末作業

基本的には、こちらの公式サイトにある作業を行います。
https://www.raspberrypi.com/documentation/computers/getting-started.html

Windows 端末

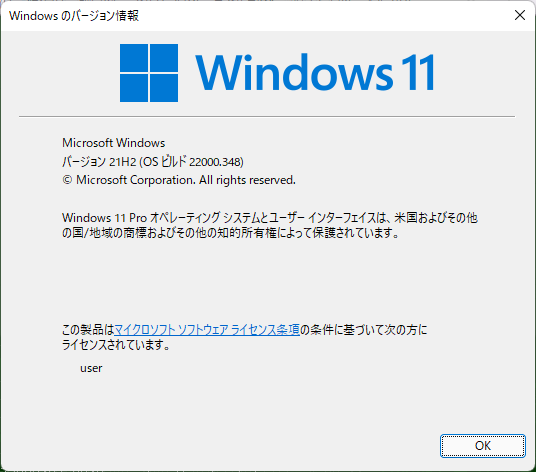
このページで紹介する手順は Windows 11 端末で実行しました。
Windows 環境
Windows 環境

Raspberry pi Imager ダウンロード

Windows 端末であれば、Windows 端末用の Raspberry Pi Imager をダウンロードします。
Raspberry Pi OS – Raspberry Pi

今回は、2023.7.9 時点で最新版だった v1.7.5 を利用しています。

Raspberry Pi Imager インストール

ダウンロードした「imager_1.6.2.exe」をダブルクリックして、起動するウィザードに従ってインストールします。
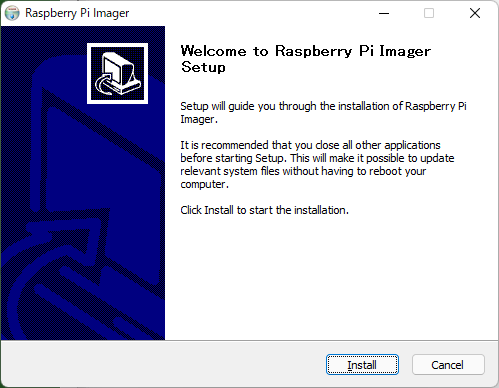
インストール開始
インストール開始

Install をクリックして、Raspberry Pi Imager のインストールを開始します。

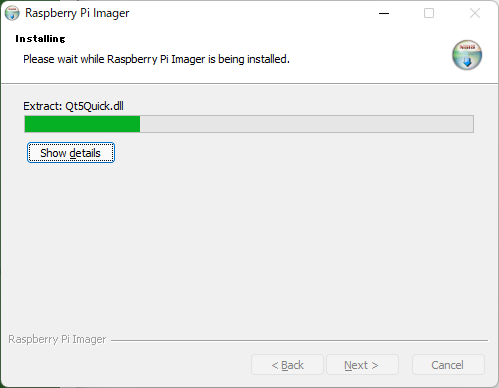
進捗
進捗

進捗状況が表示されます。

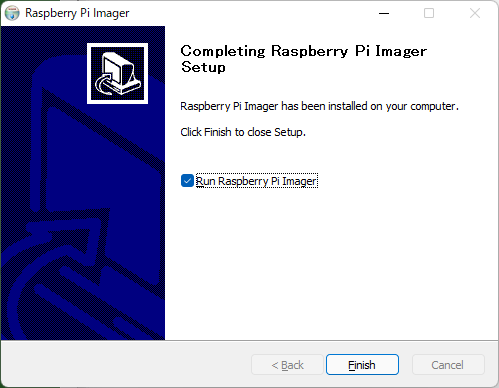
起動
Raspberry Pi Imager 起動

インストールが完了したら、Raspberry Pi Imager を起動するボタンにチェックをつけたまま Finish をクリックします。
これで Raspberry Pi Imager が起動します。

Raspberry Pi Imager

起動

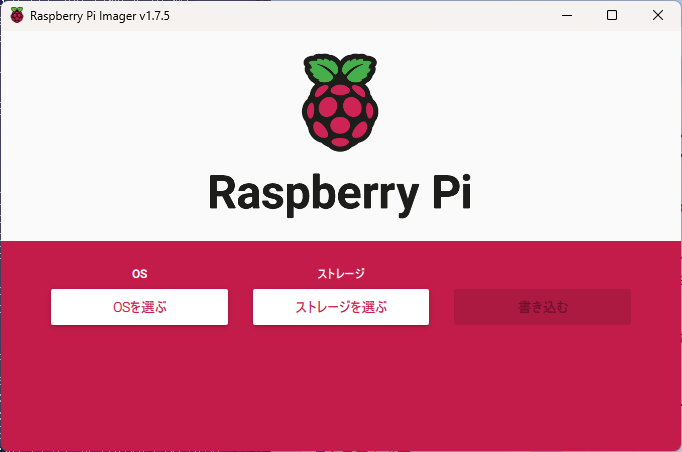
以下の画面で「OSを選ぶ」を選択します。
Raspberry Pi OS Imager
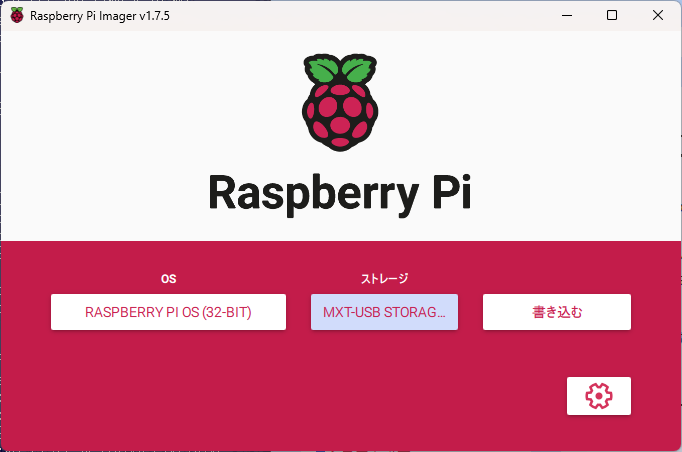
RPi OS Imager

OS

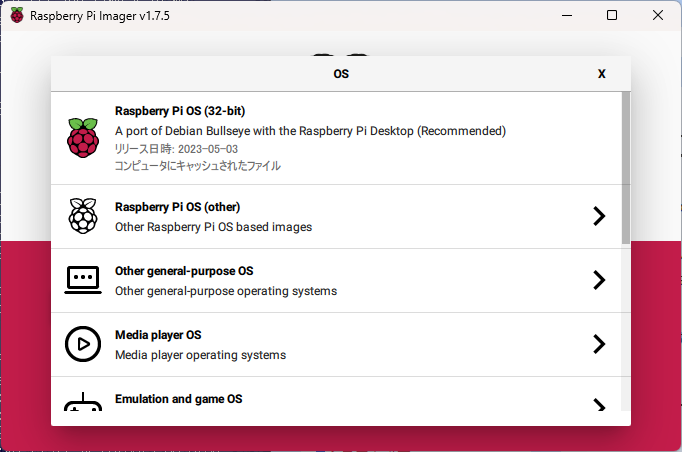
以下の画面で「Raspberry Pi OS (32-bit)」を選びます。
OS select
RPi OS Imager

ストレージ

以下の画面で、適切なストレージを選びます。
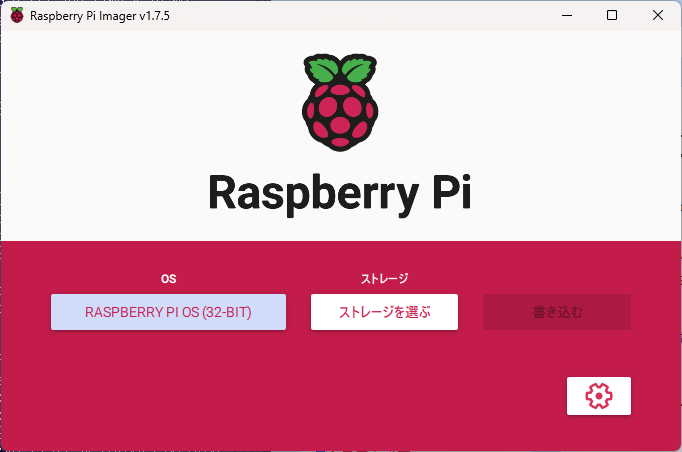
「OSを選ぶ」ボタンが、選択した OS の名前に変わります。
Storage
RPi OS Imager

ストレージ選択

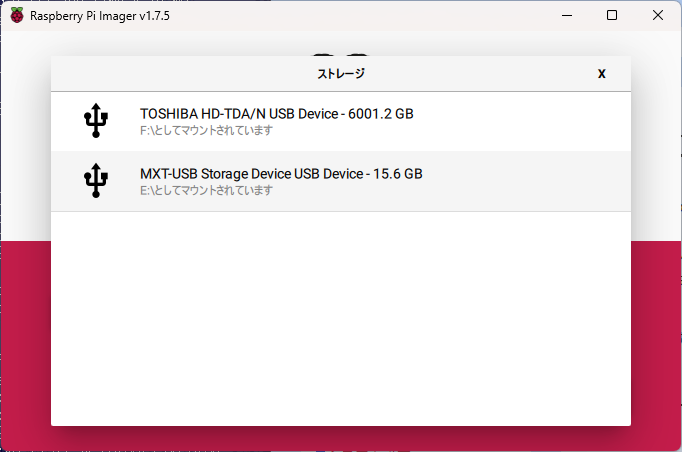
差し込んだ MicroSD カードを選びます。
今回は 32GB の microSD カードを差しているので、E ドライブとしてマウントされている 31.3GB のものを選びます。
Storage select
RPi OS Imager

詳細な設定

「ストレージを選ぶ」ボタンが、選択したストレージに変わっています。

以下の画面で、右下のギアボタンを選びます。
Gear Button
RPi OS Imager

詳細な設定画面の表示

ここでは、必要に応じて入力します。
ホスト名
適切なホスト名を入力します。
SSH setting
RPi OS Imager
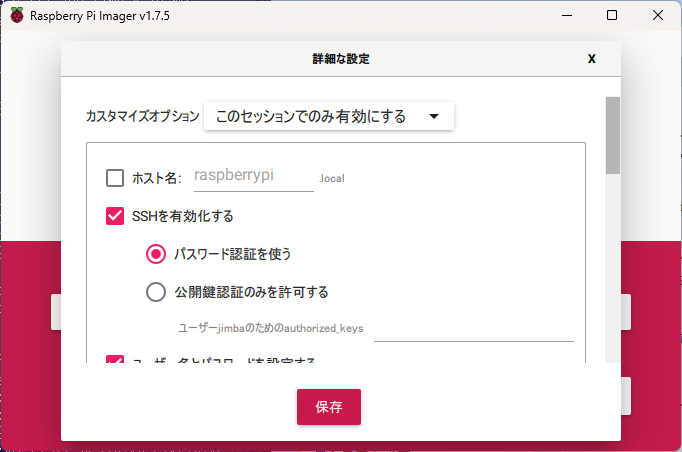
SSH 有効化
別途設定が不要になるので、ここで SSH 設定をしておきます。
SSH setting
RPi OS Imager
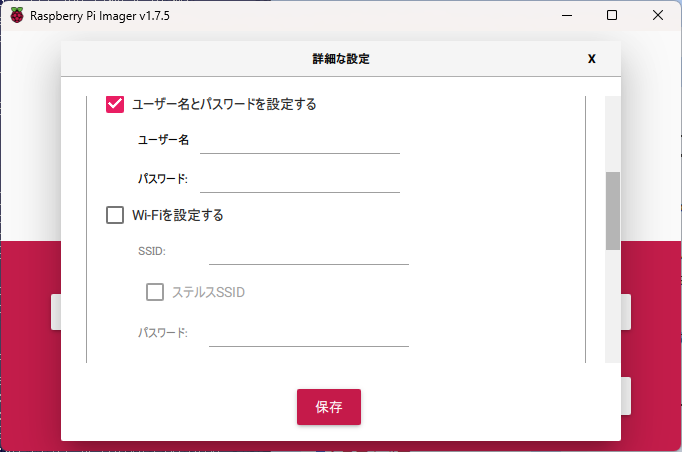
アカウント設定
デフォルトだった pi ユーザの代わりに、利用するユーザー名とパスワードを指定します。
Account
RPi OS Imager
Wi-Fi 設定
必要であれば設定します。
(サーバ利用であれば、基本的には不要なはずですが)
Wi-Fi setting
RPi OS Imager
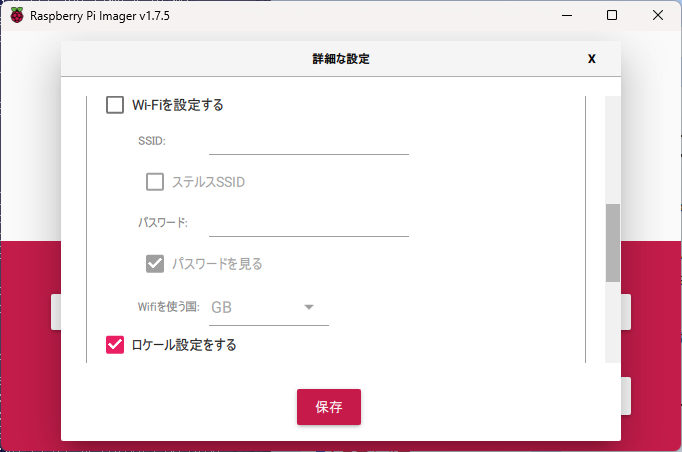
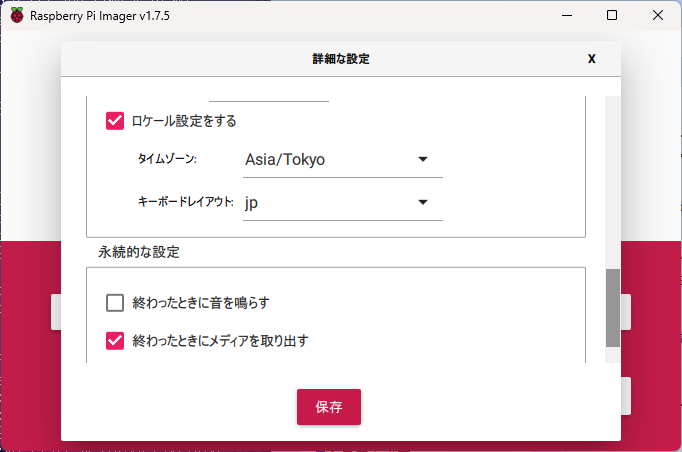
ロケール設定
地域は設定しておくと、いろいろ表示周りがスッキリするので、指定しておきます。
Locale setting
RPi OS Imager
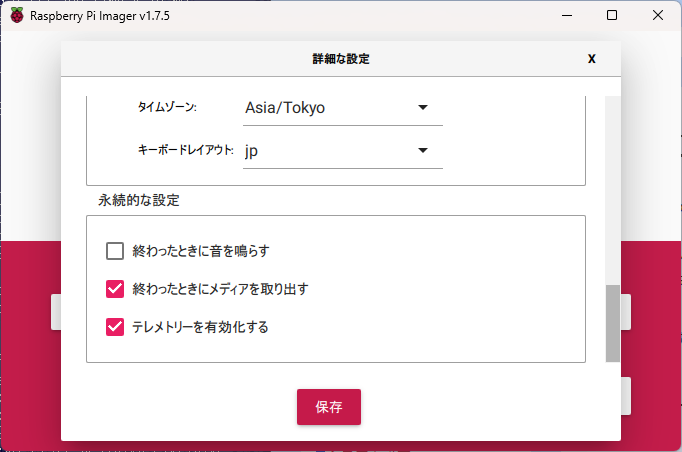
永続的な設定
変更不要です。

そのまま保存を選択します。
Eternal setting
RPi OS Imager

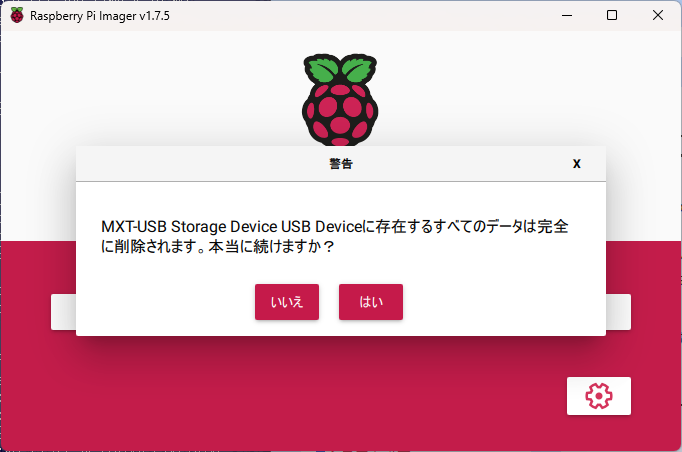
データ削除の確認

microSD カードに入っているデータを消して OS 設定しても良いかの確認を行います。
続けなければ OS インストールできないので、「はい」を選択します。
Delete announce
RPi OS Imager

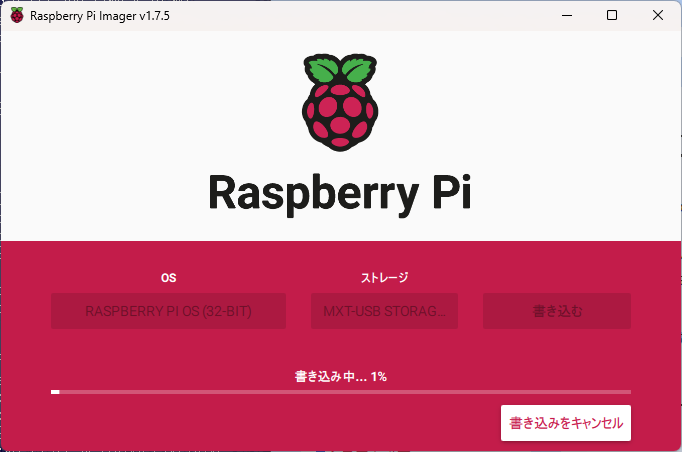
表示確認

インストールの進行状況が表示されるので、興味があれば見ておきます。
Wriging progress
RPi OS Imager

終了処理

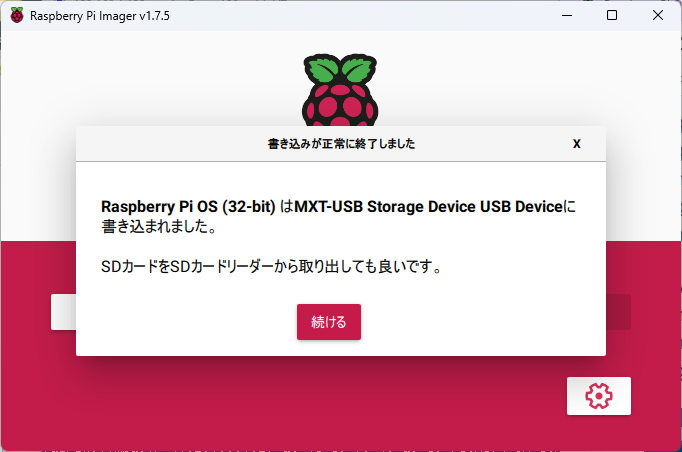
以下の画面が表示されたら「続ける」を選択します。
End
]

終了

最初の画面に戻るので、右上の「×」を選択してアプリを終了させます。
Raspberry Pi OS Imager
RPi OS Imager

microSD カードの入れ替え

microSD カードを、Windows 端末の SD カードリーダから、Raspberry Pi に差し替えます。

dhcp 環境であれば、電源を入れたあと、ネットワークからアクセス可能になっています。

接続確認

dhcp 環境の場合、ネットワーク上から Raspberry Pi を探す必要があります。

参考までに、MAC アドレスのベンダー ID を記載しますが、Raspberry Pi の MAC アドレスは増えることがあります。

MAC アドレスのベンダー ID
https://udger.com/resources/mac-address-vendor-detail?name=raspberry_pi_foundation
範囲備考
28:CD:C1:xx:xx:xx
B8:27:EB:xx:xx:xx
D8:3A:DD:xx:xx:xx
DC:A6:32:xx:xx:xx
E4:5F:01:xx:xx:xx

Windows プロンプト

コマンドプロンプトを起動して、ブロードキャストアドレス宛てに ping を送信して、arp を参照します。
> ping 192.168.x.255
> arp -a

ssh ログイン

Tera Term 等でリモートログインします。
Tera Term についての詳細は Tera Term の使い方 を参照してください。

adiary on RPi 12

2023/12/14 22:09 OS別::Linuxその他::技術情報
別途 adiary on RaspPi という記事で Raspberry Pi OS に adiary をインストールして、利用するところまで記事にしていますが、バージョンが上がったことでいくつか不都合があったり、仕様に手を入れたりしているので、新しく記事にしてみます。

前提条件

この記事を作るにあたって、以下の読者を想定しています。
  • CUI でのコマンド操作ができる。
  • TCP/IP の基礎知識をもっている。
  • 記事の内容を、自身の環境に読み替えることができる。

環境

筐体

Raspberry Pi 3 Model B を利用します。

Raspberry Pi OS バージョン

Debian 系 OS である、Raspberry Pi OS を利用します。
バージョン等は、以下の通りです。
$ cat /etc/os-release
PRETTY_NAME="Raspbian GNU/Linux 12 (bookworm)"
NAME="Raspbian GNU/Linux"
VERSION_ID="12"
VERSION="12 (bookworm)"
VERSION_CODENAME=bookworm
ID=raspbian
ID_LIKE=debian
HOME_URL="http://www.raspbian.org/"
SUPPORT_URL="http://www.raspbian.org/RaspbianForums"
BUG_REPORT_URL="http://www.raspbian.org/RaspbianBugs"

注意点

Debian 系で cgi を動作させる場合、通常は /usr/lib/cgi-bin/ に置くものなのですが、自身の都合で環境設定を変更しています。

環境準備

Raspberry Pi OS インストール

以下の順番で、手順を参照してください。
  1. RPi OS インストール

Raspberry Pi OS 管理外

DNS 設定および HTTPS 設定 (TLS) については、ドメインのレジストリ/レジストラや証明書の発行機関が関わるため、ここでは記載しません。

端末からテスト的に名前解決したい場合は hosts に記載すると良いでしょう。
対象のファイルパスは、以下の通りです。
C:\Windows\System32\drivers\etc
例えば、192.168.10.10 が Raspberry Pi サーバで、example.jp という名前でアクセスしたい場合、上のファイルに次のように記載します。
192.168.10.10 example.jp
この設定を行った端末からは、192.168.10.10 に対して example.jp という名前でアクセスできるようになります。

Raspberry Pi OS 各種設定

以下の順番で、手順を参照してください。
  1. Raspberry Pi OS raspi-config
  2. Raspberry Pi OS 実行環境整備
  3. Raspberry Pi OS IPv4 静的設定
  4. Raspberry Pi OS NTP 設定

前提パッケージのインストール

以下の順番で、手順を参照してください。
  1. apache2 設定
  2. adiary 関連ライブラリ

adiary パッケージインストール(tar ボウル利用)

バージョンごとにしばらくバックアップ環境を残したいので、基本的にはこちらを利用しています。

ログ出力ディレクトリ作成

デフォルトより1段下げてログ出力したいので、専用ディレクトリを作成します。
$ sudo mkdir /var/log/apache2/adiary
ちなみに、apache の環境設定ファイルで $APACHE_LOG_DIR と書きますが、/var/log/apache2/ を指します。

作業準備

作業環境を整備します。
$ grep www /etc/passwd
$ cd /var/
$ ls -ld /var/www
drwxr-xr-x 3 root root 4096  7月  9 17:37 /var/www
$ sudo chown www-data:adm www
$ ls -ld /var/www
drwxr-xr-x 3 www-data www-data 4096  7月  9 17:37 /var/www
$ sudo su -s /bin/bash - www-data
$ pwd
/var/www
$ cp /etc/skel/.bashrc .
$ vi .bashrc
# umask
umask 027
$ diff .bashrc /etc/skel/.bashrc
114,116d113
<
< # umask
< umask 027
$ . .bashrc

ダウンロード(tar ボウル)

https://adiary.org/pub/adiary/image/download/release/ にアクセスして、最新版を取得します。
ここでは、執筆時に最新版であった adiary-3.50h.tar.bz2 を利用します。
$ curl https://adiary.org/pub/adiary/image/download/release/adiary-3.50h.tar.bz2 --output adiary-3.50h.tar.bz2
$ ls -l
合計 4324
-rw-r----- 1 www-data www-data 4421745 12月 12 21:26 adiary-3.50h.tar.bz2
drwxr-xr-x 2 root     root        4096 12月 12 21:32 html
$ sha256sum adiary-3.50h.tar.bz2
fb3beaea3ae1efdd3ed9855cd2f0ea2fe8c11299a9bc8864710591f80842f1a6  adiary-3.50h.tar.bz2
$ tar tvf adiary-3.50h.tar.bz2
$ tar xf adiary-3.50h.tar.bz2
$ ls -l
合計 4328
drwxr-x--- 13 www-data www-data    4096 10月 16 11:28 adiary-3.50h
-rw-r-----  1 www-data www-data 4421745 12月 12 21:26 adiary-3.50h.tar.bz2
drwxr-xr-x  2 root     root        4096 12月 12 21:32 html
$ ln -s adiary-3.50h adiary
$ ls -l
合計 4328
lrwxrwxrwx  1 www-data www-data      12 12月 12 21:34 adiary -> adiary-3.50h
drwxr-x--- 13 www-data www-data    4096 10月 16 11:28 adiary-3.50h
-rw-r-----  1 www-data www-data 4421745 12月 12 21:26 adiary-3.50h.tar.bz2
drwxr-xr-x  2 root     root        4096 12月 12 21:32 html
$ exit

adiary 環境構築

ここからは、初期設定を記述します。

サーバ移行とかシステム復旧のような、データを上書きする場合はここで処理を止めます

Apache2 設定

adiary のインストール後でなければ行えない Web 公開設定を行います。
設定ファイル作成のための事前調査
adiary が制限を入れたいディレクトリは .htaccess ファイルが置かれています。
.htaccess ファイルを無効にし、すべて apache の設定ファイルに記述するようにしているため、ファイルを探しておきます。
$ sudo find /var/www/adiary -name .htaccess
./adiary-3.50h/lib/.htaccess
./adiary-3.50h/skel.local/.htaccess
./adiary-3.50h/info/.htaccess
./adiary-3.50h/plugin/.htaccess
./adiary-3.50h/__cache/.htaccess
./adiary-3.50h/data/.htaccess
./adiary-3.50h/skel/.htaccess
設定ファイルの作成
上記の制限内容を踏まえて、設定ファイルを作成します。
$ cd /etc/apache2/sites-available
$ sudo vi 001-adiary.conf
(Config writing...)
$ sudo cat 001-adiary.conf
<VirtualHost *:80>
    ServerName  ttm.jimba.ddo.jp
    ServerAdmin xxx@jimba.ddo.jp
    DocumentRoot /var/www/adiary

    <Directory /var/www/adiary>
        Options ExecCGI
        AllowOverride None

        # Rewite module
        RewriteEngine   On
        RewriteCond     %{REQUEST_FILENAME}  !-f
        RewriteRule     ^(.*)$               adiary.cgi/$1   [L]

    </Directory>

    <Directory /var/www/adiary/__cache>
        order allow,deny
        deny from all
    </Directory>

    <Directory /var/www/adiary/data>
        order allow,deny
        deny from all
    </Directory>

    <Directory /var/www/adiary/skel>
        order allow,deny
        deny from all
    </Directory>

    <Directory /var/www/adiary/plugin>
        order allow,deny
        deny from all
    </Directory>

    <Directory /var/www/adiary/info>
        order allow,deny
        deny from all
    </Directory>

    <Directory /var/www/adiary/lib>
        order allow,deny
        deny from all
    </Directory>

    <Directory /var/www/adiary/skel.local>
        order allow,deny
        deny from all
    </Directory>

    ## CustomLog
    # Variable setting - IP address
    SetEnvIf Remote_Addr 192.168.  local_network suppres-log

    # Variable setting - Crawler
    SetEnvIf User-Agent "BLEXBot"        crawler suppres-log
    SetEnvIf User-Agent "bingbot"        crawler suppres-log
    SetEnvIf User-Agent "Googlebot"      crawler suppres-log
    SetEnvIf User-Agent "Twitterbot"     crawler suppres-log
    SetEnvIf User-Agent "Applebot"       crawler suppres-log
    SetEnvIf User-Agent "DataForSeoBot"  crawler suppres-log
    SetEnvIf User-Agent "DotBot"         crawler suppres-log
    SetEnvIf User-Agent "Bytespider"     crawler suppres-log
    SetEnvIf User-Agent "GPTBot"         crawler suppres-log
    SetEnvIf User-Agent "LivelapBot"     crawler suppres-log

    # Variable setting - Site (Directory)
    SetEnvIf Request_URI "/coffee"       coffee suppres-log

    ErrorLog ${APACHE_LOG_DIR}/ttm/error.log

    # Log output
    CustomLog ${APACHE_LOG_DIR}/adiary/local-access.log combined env=local_network
    CustomLog ${APACHE_LOG_DIR}/adiary/crawler-access.log combined env=crawler
    CustomLog ${APACHE_LOG_DIR}/adiary/coffee-access.log combined env=coffee
    CustomLog ${APACHE_LOG_DIR}/adiary/access.log combined env=!suppres-log

</VirtualHost>
【参考情報】/var/www/adiary/.htaccess に書きたい内容は、上記主設定ファイル (201-adiary.conf) の <Directory /var/www/adiary> ~ </Directory> の中に書く。

根拠は、apache2 公式サイトより引用した以下の通り。
普通は可能であれば .htaccess ファイルの使用は 避けてください。.htaccess ファイルに書こうと考えるようなすべての設定は、サーバの主設定ファイルの セクションで同じように行なうことができます。
Apache HTTP Server Tutorial: .htaccess files - Apache HTTP Server Version 2.4
ログローテーション設定
デフォルトのディレクトリにログを出力していれば不要なのですが、分かりやすさ優先で階層を作ったので、ログローテーション設定を追加します。
$ sudo cp -p /etc/logrotate.d/apache2 /etc/logrotate.d/adiary
$ vi /etc/logrotate.d/adiary
$ diff /etc/logrotate.d/apache2 /etc/logrotate.d/adiary
1c1
< /var/log/apache2/adiary/*.log {
---
> /var/log/apache2/*.log {
$ sudo systemctl status logrotate
特にサービス再起動とかは不要のよう。
設定ファイル有効化
設定ファイルを有効化する。
$ sudo a2ensite 001-adiary
Enabling site 201-adiary.
To activate the new configuration, you need to run:
  systemctl reload apache2
$ sudo apachectl configtest
$ sudo systemctl reload apache2
不要ファイル削除
また、不要になった設定ファイルは、混乱のもとなので消しておきます。
$ sudo find /var/www/adiary -name ".htaccess" -exec rm {} \;

Web 上での設定

DNS へ登録した URL (本サイトならば http://ttm.jimba.ddo.jp/) へアクセスして、root アカウント登録や、個別アカウントの登録などを行います。
root アカウント登録
案内にしたがって、管理者登録を行います。
http://ttm.jimba.ddo.jp/adiary.cgi?user/add
登録すると、登録した管理者ユーザでログインし直すようアナウンスがあるので、ログインし直します。
個別アカウント登録
ブログを更新するユーザ等、個別にアカウントを作成します。

Web での設定後

初期画面からのリダイレクト設定
初期画面から作成したブログ画面へ移動するため index.html を書き換えます。
$ cd /var/www/adiary
$ cp -p index.html{,_backup_$(date +'%Y%m%d')}
$ cat /dev/null > index.html
$ vi index.html
(書き換え)
$ cat index.html
<html>
  <head>
    <meta http-equiv="Refresh" content="0;URL=adiary.cgi">
  </head>
</html>
$ 
robots.txt
ボットに公開/非公開したい情報を教える設定。

以下はすべてのクロウラを拒絶する例

/var/www/adiary/robots.txt
User-agent: *
Disallow: